First steps in using Magento

When it comes to downloading your own copy of Magento, there are two ways to download the newest package, directly on the website (it requires logging in) or through svn. In this blog post you’ll find detailed steps on going through the downloading and installing procedure. What once seemed impossible will now be a quick breeze through simple steps!
Steps through svn
In the terminal you type in:
Svn checkout (http://svn.magentocommerce.com/source/branches/1.8) magento
next you have to configure Apache so that the VirtualHost pointed to the “magento” catalog
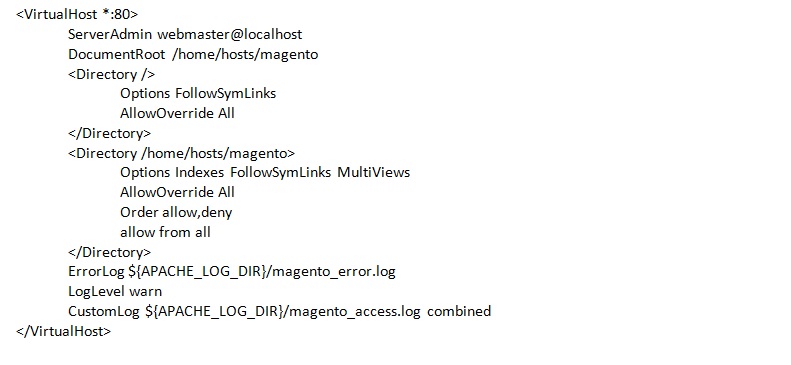
Now you have to restart Apache. In the terminal, type in:
sudo /etc/init.d/apache2 restart
In your web browser type in:
Installation
Installation has been divided into 6 steps, in which the first two are focused on accepting a license and choosing the language, currency, and time zone.
The spot where the configuration database is located, can greet us with a sad information that a part of the catalogues does not have permission to save, but that’s something that’s easy to fix by writing the following in the terminal:
find . -type f –exec sudo chmod 644 {} ;
find . -type d -exec sudo chmod 755 {} ;
sudo chmod o+w var var/.htaccess app/etc
sudo chmod 550 mage
sudo chmod -R o+w media
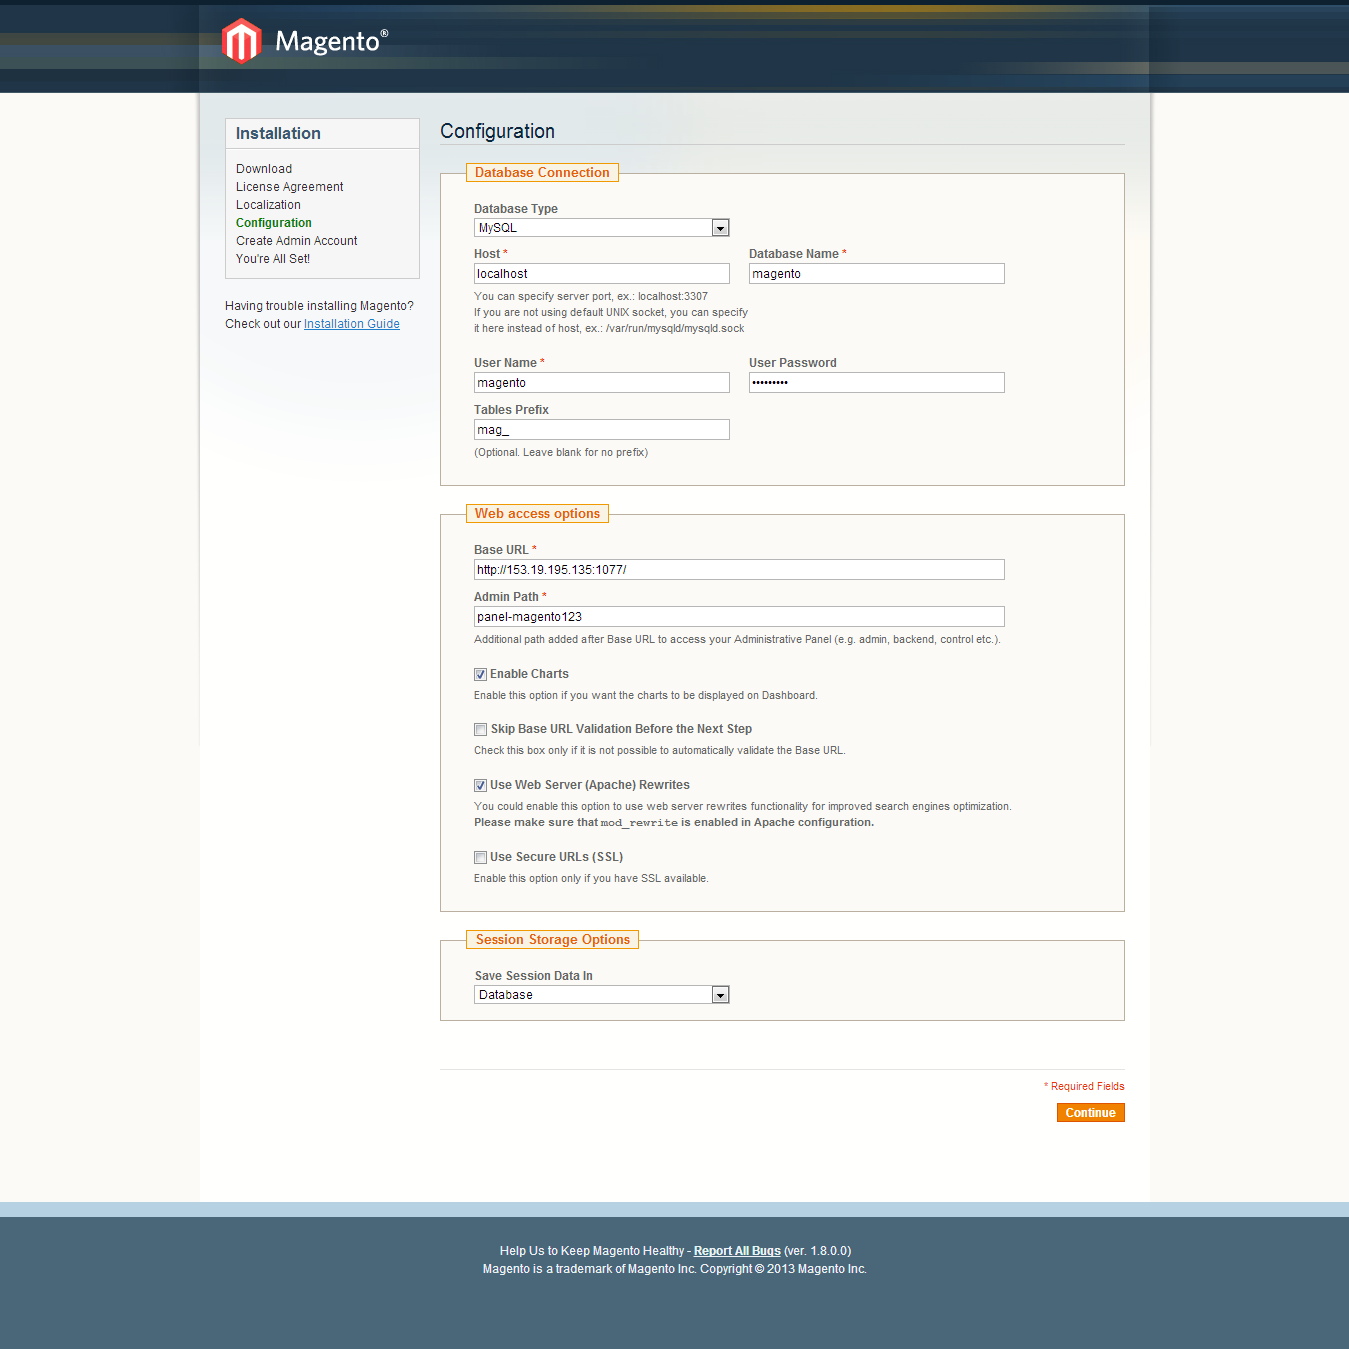
Next, we proceed to pick the right configuration of the database.
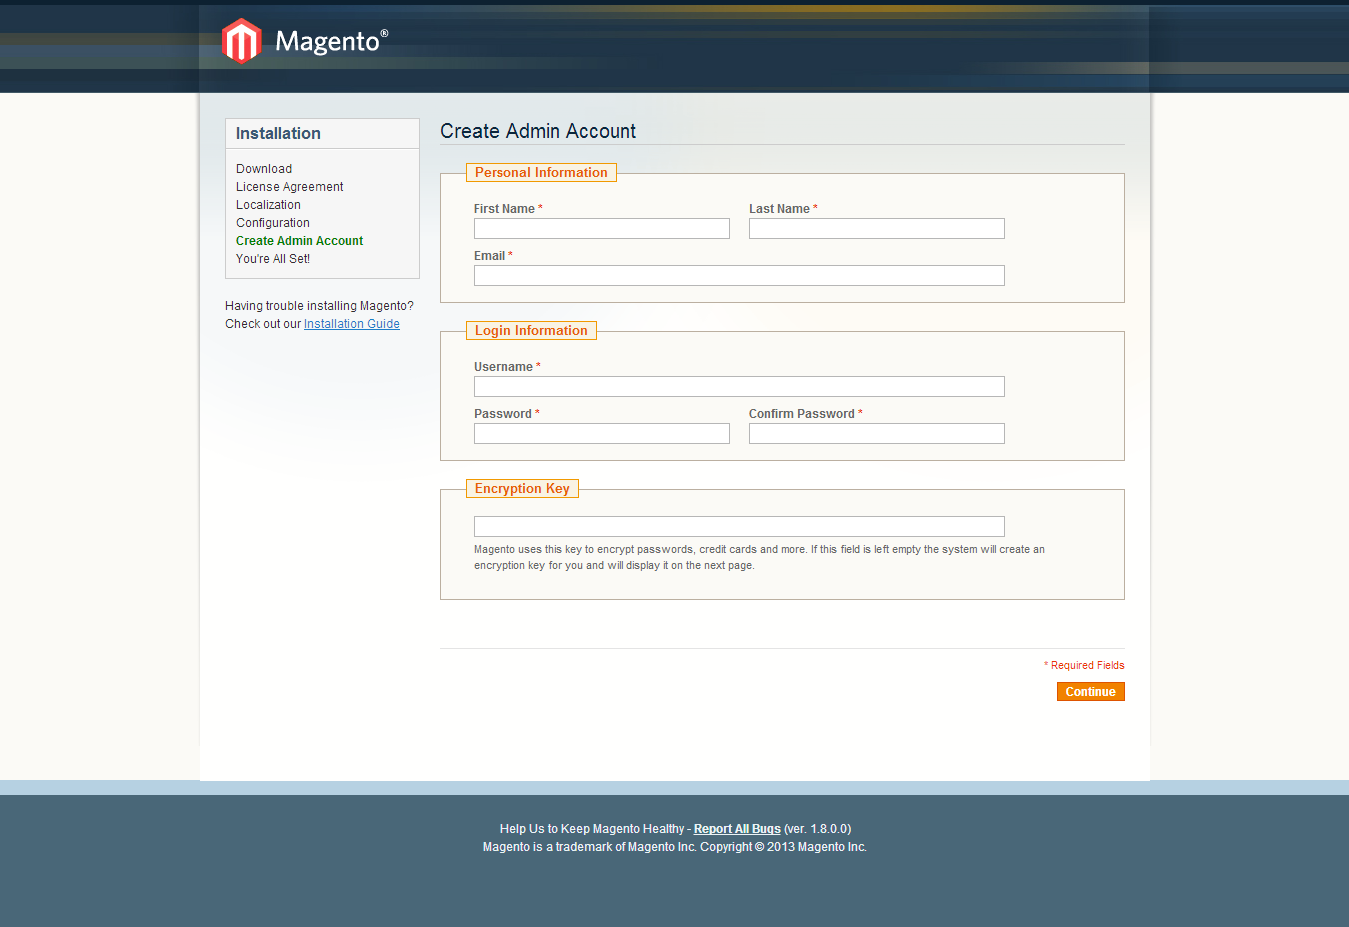
Once we’ve properly configured the database, set the module that rewrites addresses, and determined where the session will be stored, we create an Administrative account. The Admin account will have access to the administrative panel.
The last step is a survey about what you’re selling online and how you sell it. It’s not required and it’s enough that you click “Go to Frontend” (customers view of the store) or “Go to Backend” (the administrative panel).
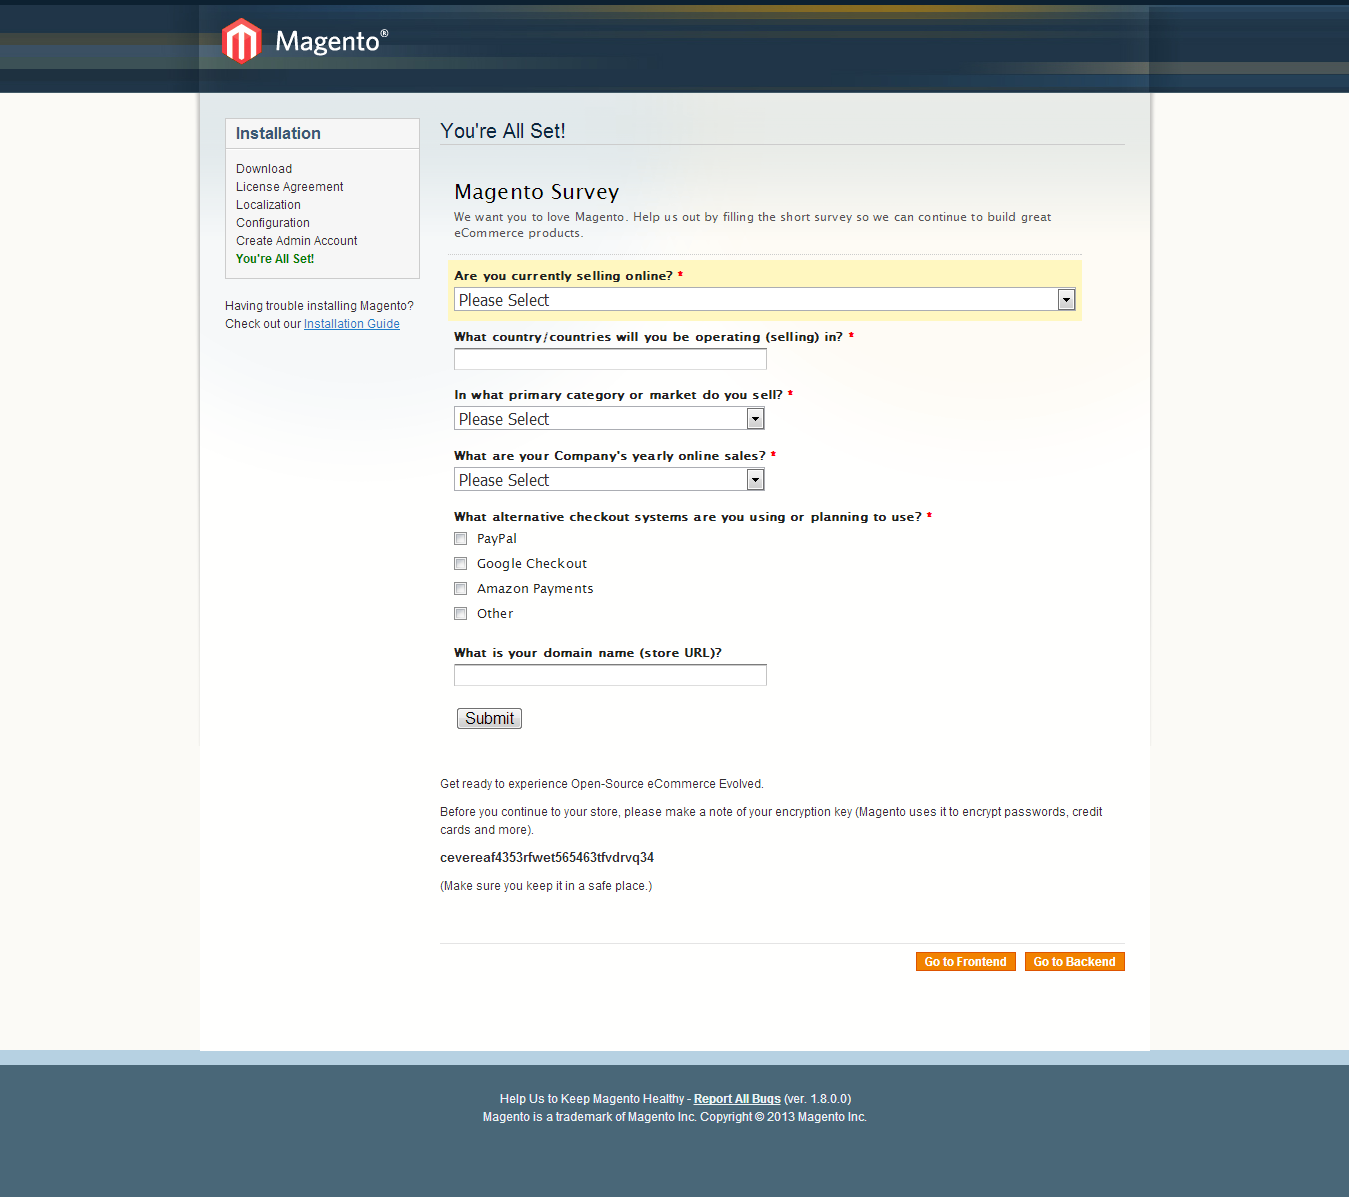
We’re going to go to the Backend/Administrative Panel view.
Adding a category and a product
To add a product we click on the “Catalog” tab, and then “Manage Products”. After the pages loads, on the right you should find an “Add Product” button, click the button to add your products. We set “Attribute Set” to default and type of product to “Simple Product”.
Now, in the “General” tab we fill in the spaces (Name, Description, Short Description, SKU, Weights, Status, and Visibility).
Next we move onto the “Prices” tab and we fill in the Price and Tax Class spaces.Afterwards we find the “Inventory” tab where we fill in the Qty (quantity of a given item). Once we set the Qty for example, to one, it doesn’t mean that the item is now available to be bought. For a product to truly be available, the “Stock Availability” must be changed to “In Stock”, only then the items will be available. The last step is to add a picture of our item.
Adding a category
To add a new category click on “Catalog” and then “Manage Categories”. Next we click Default Category, followed by Add Subcategory.
In the first tab we fill in Name, Is Active and set it to Yes, and Include in Navigation Menu we also set to Yes. Now we click Save Category in the upper right corner.
Next we click on “System” and “Manage Stores”, we look for “Main Website Store” and we click on it and choose so that in the “Root Category” and “Default Category” showed up, finally we click “Save Store”.
Photo Credit : Viktor Hanacek, picjumbo